Recently, there was some great news on the Flicka Home Page, Sail Net and on the Pacific Seacraft Home Page. Pacific Seacraft is putting the Flicka and the Dana back into production. There was enough interest in both designs to bring this about. Pacific Seacraft sent me the specification sheet for the Flicka. The base price is $59,000 with a Yanmar diesel inboard and enclosed head.
About Flicka Friends Flicka Friends is a subscription newsletter written specifically for the people who own, crew aboard or are interested in the Flicka, a Bruce P. Bingham design. Based on the Newport Boats of Block Island Sound, this little ship has been built from various materials since the 1970’s and remained in production today. Hulls have been completed by home builders using plans supplied by Bruce Bingham. More than 400 plans were sold and many Flickas can be found in New Zealand, Australia and Sweden. Commercial builders for the Flicka include Nor’Star, Westerly Marine and Pacific Seacraft (Fullerton, California) has built more than 430 Flickas. Flicka Friends is published quarterly. Please note the date next to your name on the mailing label. It indicated when your subscription needs to be renewed. The cost of an annual subscription to Flicka Friends is $1.00 US and can be mailed directly to the editor.
The initial comments made it sound like the Flicka might be spartan. After review-ing the information, there are still plenty of options available ranging from roller furling to shore power, a lightning ground, a B & G instrument package and a trailer.
You can find the specifications on the Pacific Seacraft Home Page:
Tom Davison - Editor P.O. Box 922 Sutton’s Bay, MI 49682-0922 (231) 271-5111 flickafriends@traverse.net
Dennis Pratt - Publisher 8537 N. Milwaukee Ave., 2-West Niles, IL 60714-1909 (847) 736-0066 dennis1492@aol.com Flicka Friends - Fall - 2000
One Way to Get A Flicka... Continued from Page 1
mixing cement). That worked pretty well but the mold wasn’t real fair. So I covered the cement with plaster of paris that I could then sand (endlessly) to get a clean, fair mold. Finally, I painted the plaster and applied a thin coat of mold release agent (it turned out to be too thin) and my mold was complete. Of course, I was already well over a year into the project since I could only work on the mold in the summer (Rochester, remember) and I was busy graduating high school, starting college and working as a waiter in a restaurant to pay for all the materials. For the next two years I laid up between 10 and 12 layers of woven roving, sanding the rough edges endlessly between each one. Successive layers of roving were applied in alternating directions, vertical, horizontal and diagonally. After building up about 3/8 inch thickness, I decided extensive sanding between layers was too time consuming (not to mention itchy!).
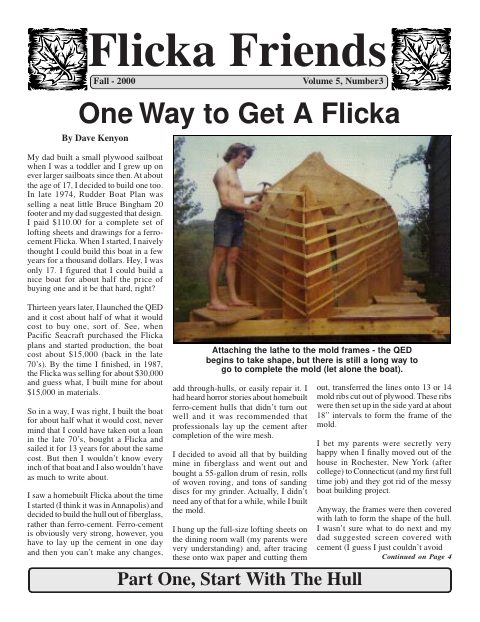
After framing the mold, I attached screen to provide the foundation for the cement and plaster which then completed the mold
Also, I had read about the favorable strength of using alternating layers of fiberglass mat (fiberglass stands pressed together in random orientations) together with cloth, where the strands are woven together. I decided to flip the hull over and continue adding layers on the inside without the need to sand each layer smooth. I tested the separation of the hull and mold and found that there was no way I was doing to be able to lift the hull off. I previously had ideas of saving the mold and selling it, however, I ultimately ended up removing the mold from underneath the hull, piece by piece. The mold had to be destroyed and in some spots scraped away from the hull. After adding a few temporary cross braces (the empty glass hull was very flexible) I got as many friends as I could gather and we lifted the empty hull up,
Wetting out the cloth with resin requires quick work and a proper mixture of resin to hardener - too slow and it does not set properly, too fast and it hardens in the jug. Volume 5, Number 3
Start With The Hull moved it onto the grass and basically rolled it over into the wooden cradle I had built on top of the upside-down hull. This wasn’t actually that difficult with a lot of hands as the hull was relatively light. Now that I could work on the inside, I added four to six more layers of glass, alternating mat and cloth (a lighterweight cloth than the woven roving). The mat was laid first and thoroughly saturated with resin and then the cloth was laid on top with the mat still wet.
Here I am sanding (again) the hull - notice the long sleeves, gloves, hat, and mask, all in an unsuccessful attempt to avoid the itches.
By squeegeeing the cloth onto the mat, any excess resin was soaked up by the cloth to make a very solid double layer. I had to work with small sections to complete this process before the resin hardened, however, it worked very well and I was able to quickly build up the fiberglass thickness, especially in the bilge. Next, I considered molding lead for the ballast, however, I decided it would be easier to use lead ingots instead. I bought 10 - 100 pound ingots that looked like large bricks with interlocking ends. These were placed in the bilge and then filled in with cement. Finally, the ballast was covered with more fiberglass to securely enclose it so it could never move. I think I ended up with about 1200 pounds of internal ballast. This completed my hull, about the time I graduated from college. I got my first job working on the Hubble Space Telescope at the Perkin-Elmer Corporation in Danbury, CT. I paid a few hundred dollars to Orville Mill of Lakeview Boat Haulers to move the hull to Connecticut for the next phase of the project - the deck.
The partially completed hull after removing the mold and rolling it over. My son says I was a lot thinner then!
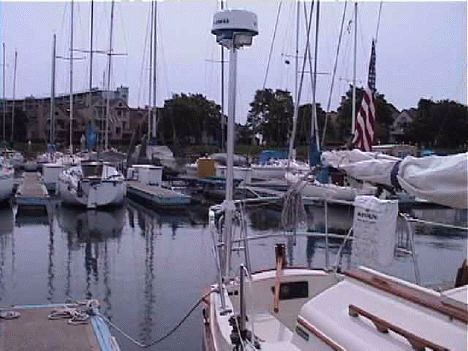
This is the first in a series of articles about the construction of a Flicka from from the ground up. Adding Another Room to By Tom Davison Since 1985, Richard Shepperd has been sailing BEN MAIN, Jr. (Pacific Seacraft Flicka # 315) out of Sutton’s Bay Marina in Traverse Bay (Lake Michigan). He is the second owner of this Flicka which was ordered new from the factory and sailed on Lake Michigan by Ben Main. Richard Sheperd was been aboard this Flicka since its arrival in Michigan. Two years later, he purchased the yet to be named Flicka from Ben Main’s widow and named her BEN MAIN, Jr. in tribute to the original owner. Looking up and down the docks of the marina, almost all of the other sailboats here are marconi sloops. The exception to this observation is the Bristol Channel Cutter that is berthed almost directly across from BEN MAIN, Jr.
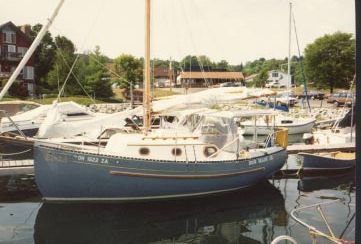
BEN MAIN, JR’s. dodger / bimini / side curtain enclosure adds a considerable amount of living space. The grey sunbrella matches the hull of this classic little yacht.
The grey hull color is something you don’t often find on a sailboat. Bruce Bingham couldn’t recall hearing of another one. The gold scroll-work and matching cove stripe stand in contrast to the hull color. As one of the eight Pacific Seacraft Flickas that were built with a gaff rig, this sailboat doesn’t share its sail plan with most of her class. This Flicka is really a gaff rig with a stays’l and roller furling 120% genoa. The varnished wood mast and boom stand out in the forest of aluminum masts that line the docks. All of the lines are lead aft to the cockpit, eliminating the need to go forward for sail adjustments or changes. To help balance the gaff-rig, Richard has added a small trim tab to the aft edge of the rudder and uses it to overcome any sail imbalance. Interesting enough, the sail reduction chart contained in The Sail-maker’s Apprentice by Emiliano Marino recommends a trim tab for the
The wooden mast, gaff, and boom rest in the lazy jacks and clear the top of the bimini. The sails are already stored for the end of the season and the boat is being readied for indoor winter storage. Volume 5, Number 3
s/v BEN MAIN Jr. primary helm trim for gaff rigs. Richard developed a single cable system that pushes and pulls. The cable is really a short motor boat steering cable. The control end of the cable is run to a brass plate located on top of the tiller. Loosening a single wing nut allows the trim tab to be adjusted. His Flicka is one of only eight built by Pacific Seacraft with gaff rigs and may well be the only grey Flicka out there. Bruce Bingham couldn’t recall another one. BEN MAIN, Jr. is equipped with a dodger, bimini, and with side and aft curtains that enclose the entire cockpit. It adds another room to the boat. (This is the subject of a future article).
Like many other Flickas, the name is located on the aft quarter rather than on the transom. A small star adds to the finish of the bow sprit.
Richard has a matching Trinka dinghy named LITTLE BEN. It has matching hull, waterline, and bottom paint colors. It currently has air bladders known as Dinghy Dogs located along the gunnels, improving the stability and buoyancy. The dingy is often used to reach his “other” sailboat, a Sea Pearl tri-marran that is located out in the bay on a mooring. Richard says this little sailboat can reach fifteen knots if sailed in a good wind. A number of years ago, Richard and BEN MAIN, Jr. were the topic of a locally produced television show about small boats. They featured a story about his Flicka and another story about his Sea Pearl. Sailing BEN MAIN Jr. is a joy. The trim tab gets some use when only a main sail is flown. Unfurling the 120% genoa easily balances this classic Flicka and makes sailing easy.
When sailing with a main and no head sail, Richard created a trim tab that helps balance the tiller. A single solid cable pushes and pulls the trim tab as required.
Regretfully, Richard may be selling his beloved Flicka next spring because of health concerns. He is often described by many of the boaters and marina workers as a very nice guy. I hope that he and his Flicka will again be one of the familiar faces and boats in the harbor this summer. Flicka Friends - Fall - 2000